
The radio panel
Control the connected radio from one panel: display, S-meter, power and SWR, a dial to drag, tuning step, mode, spots nearby and Disconnect.
ProUpdated for HamQSO 0.1.19
On this page
The radio panel puts everything you need with a radio connected via CAT in one place: a display like the radio's own, the meters (S-meter, power, SWR), a dial you drag like the VFO knob, the tuning step, the mode, the spots nearby and the button to disconnect.
Opening and closing the panel
With a radio connected, the radio bar shows at the bottom (see Using the connected radio).
- Tap the frequency in the middle of the bar (Open the radio panel), or swipe the bar up.
- The panel slides up from the bottom and the frequency "flies" from the bar into the display.
To close it:
- tap the down arrow at the top right (Close);
- or drag the top of the panel (the handle with the radio name) down;
- or tap outside the panel.
If the radio disconnects, also when the link drops, the panel closes by itself.
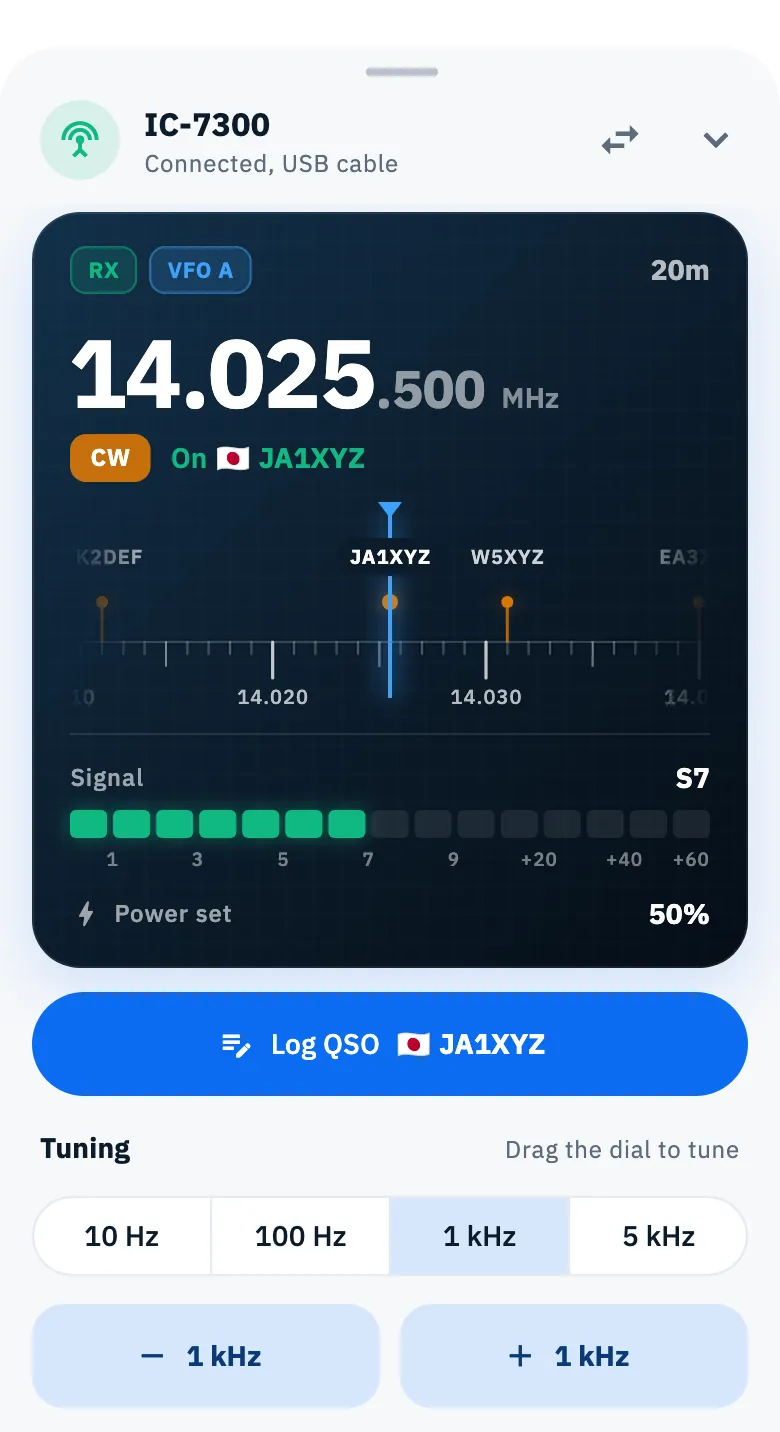
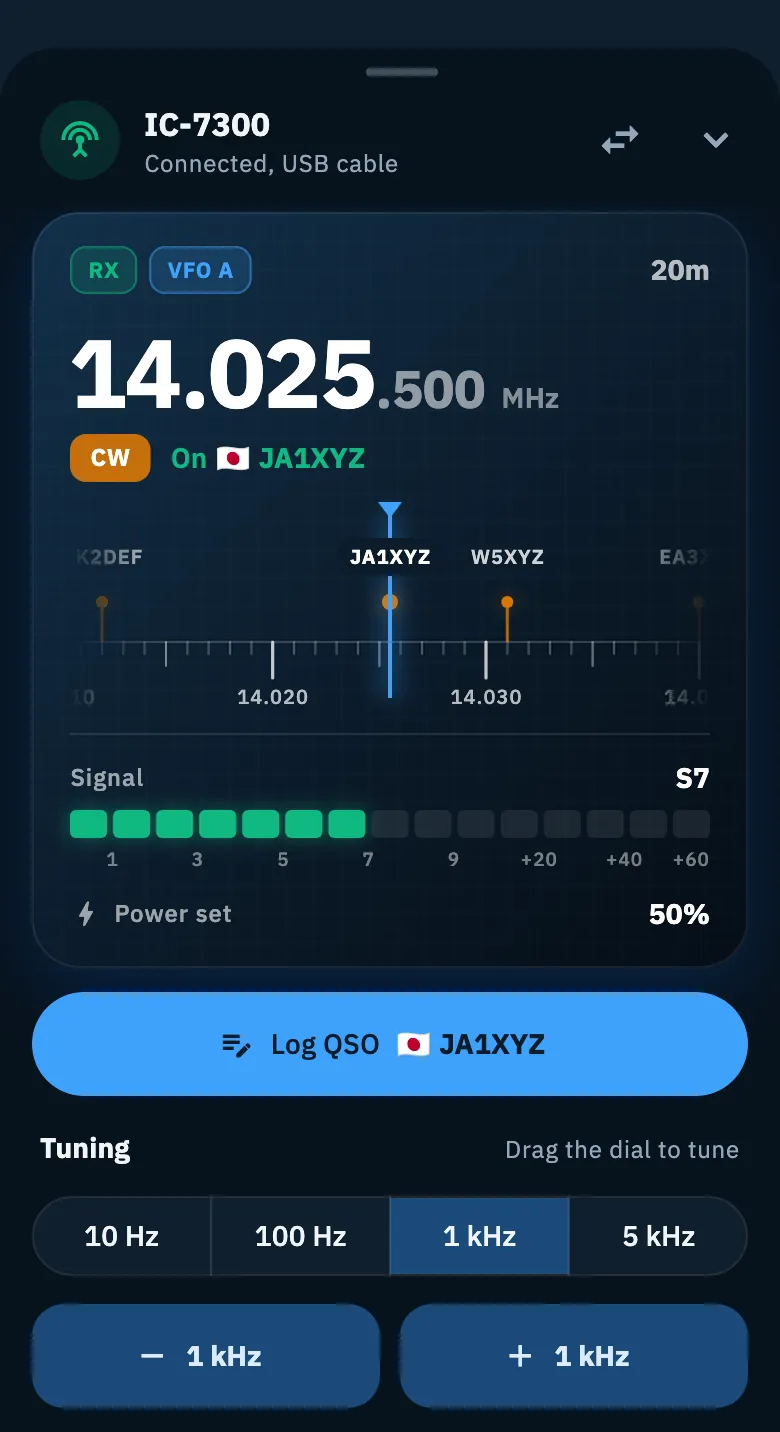
The header
At the top you see the radio name and how it is connected: Connected, USB cable, or Connected, rigctld at 192.168.1.20:4532 (the same with flrig), with the address and port you set.
If you have at least two radios with CAT, the ⇄ Switch radio button sits next to it: it opens the list of your radios to move to another one (see Using the connected radio).
The display
The display is dark, like a radio's, in both the light and the dark theme. It follows the radio live.
| Item | What it says |
|---|---|
| RX / TX | Green RX while receiving; red TX, pulsing, while you transmit. On the air the display border turns red too, with a glow. |
| VFO A, VFO B | The VFO in use. Shown only when the radio reports it. |
| Split | The radio transmits on the other VFO. Shown only when the radio reports it. |
| Band | The band of the frequency (for example 20m), or Out of band when the radio is outside the amateur bands. |
| Frequency | MHz and kHz large, hertz small: 14.025.500 MHz reads "14.025" followed by ".500". The digits roll when they change. The frequency is never rounded. |
| Mode | The radio mode (CW, USB, DATA…), in the colour of the same mode in the spots. |
| On | The callsign of the spot the radio is on, from the list of spots on screen. |
If for a moment the radio does not reply with the mode or a meter, the display keeps the last value read for 5 seconds instead of blinking.
The meters: S-meter, power and SWR
Below the dial, still in the display, there are segment bars like those of modern radios, with a mark that holds the peak for a moment.
- Receiving: Signal, the S-meter in S units (S1 to S9, then S9+20, S9+40, S9+60; above S9 the bar turns red).
- Transmitting: Power out, in watts (with a scale that adapts: 10 W, 100 W…) or as a percentage of the radio maximum, and SWR, from 1 to 3+: green below 1.5, amber from 1.5 to 2, red from 2 up. SWR shows only when the radio gives it (from 1.0 up).
- Below, with the lightning icon: Power set, the power set on the radio as a percentage.
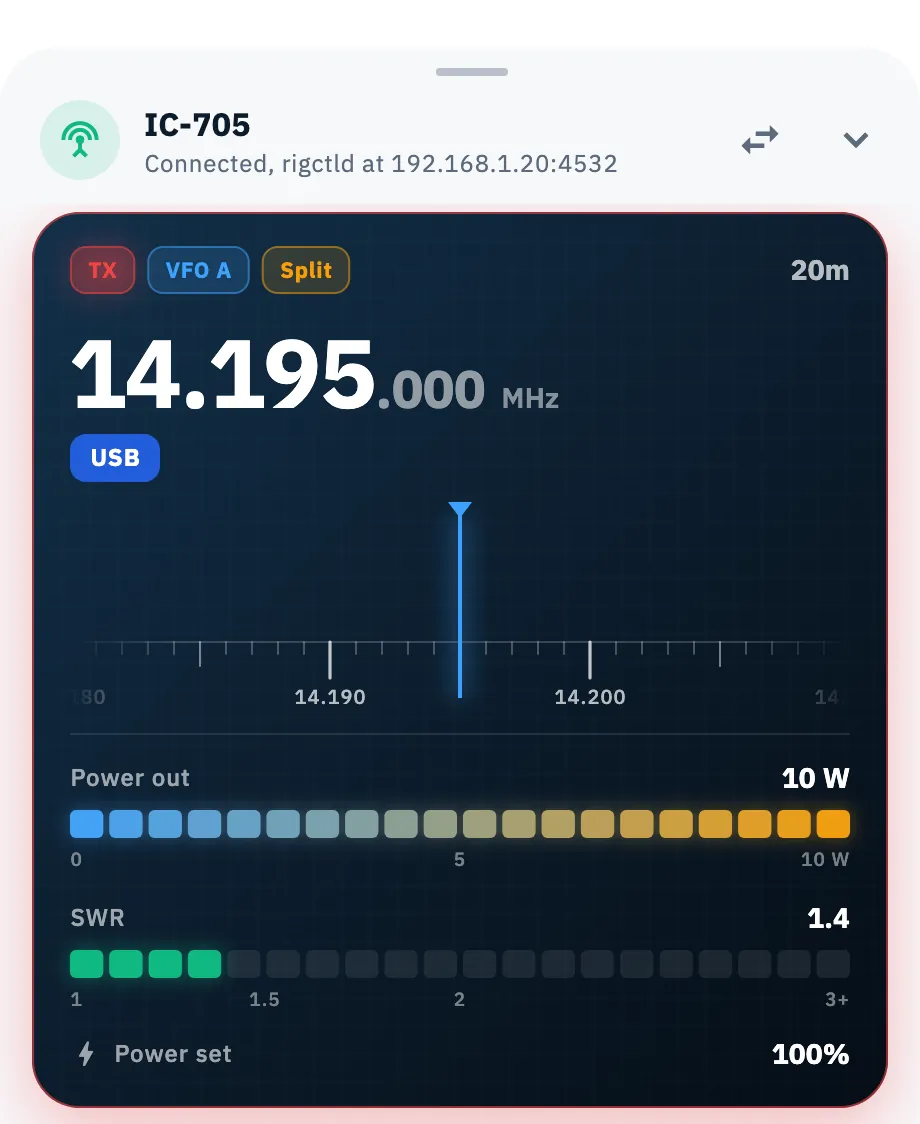
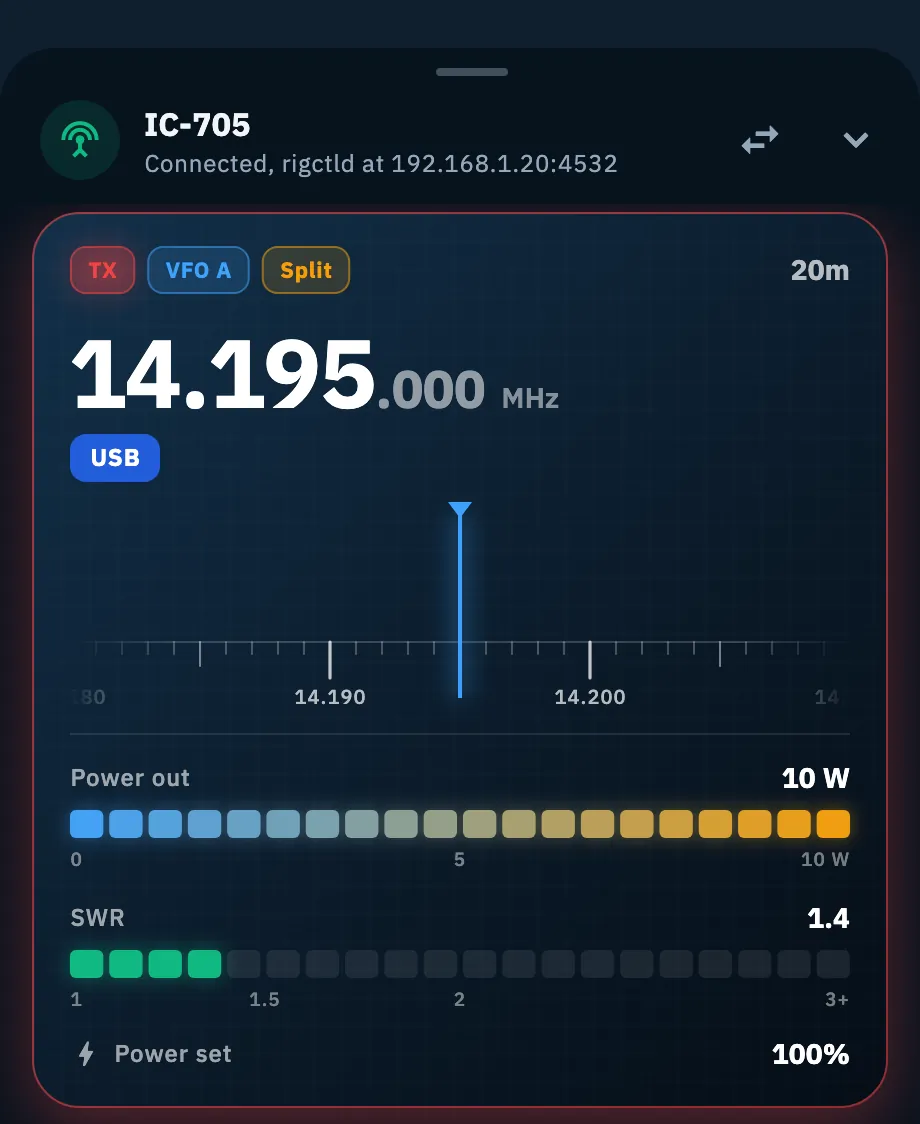
A meter the radio does not give is not shown. What you see depends on the link:
| Link | Meters |
|---|---|
| USB cable | Only with Icom radios and the others that use CI-V (such as Xiegu). Some of them do not give the power out. With other radios on the cable the display shows frequency and mode, without meters. |
| rigctld | Those rigctld can read from your radio. |
| flrig | None: with flrig the panel shows frequency and mode. |
The meters are read only while the panel is open: then the app asks the radio for them every 400 ms, so the S-meter moves. With the panel closed the radio is read once a second, for frequency and mode only. See also Connection types: USB, rigctld and flrig.
Tuning with the dial and the tuning step
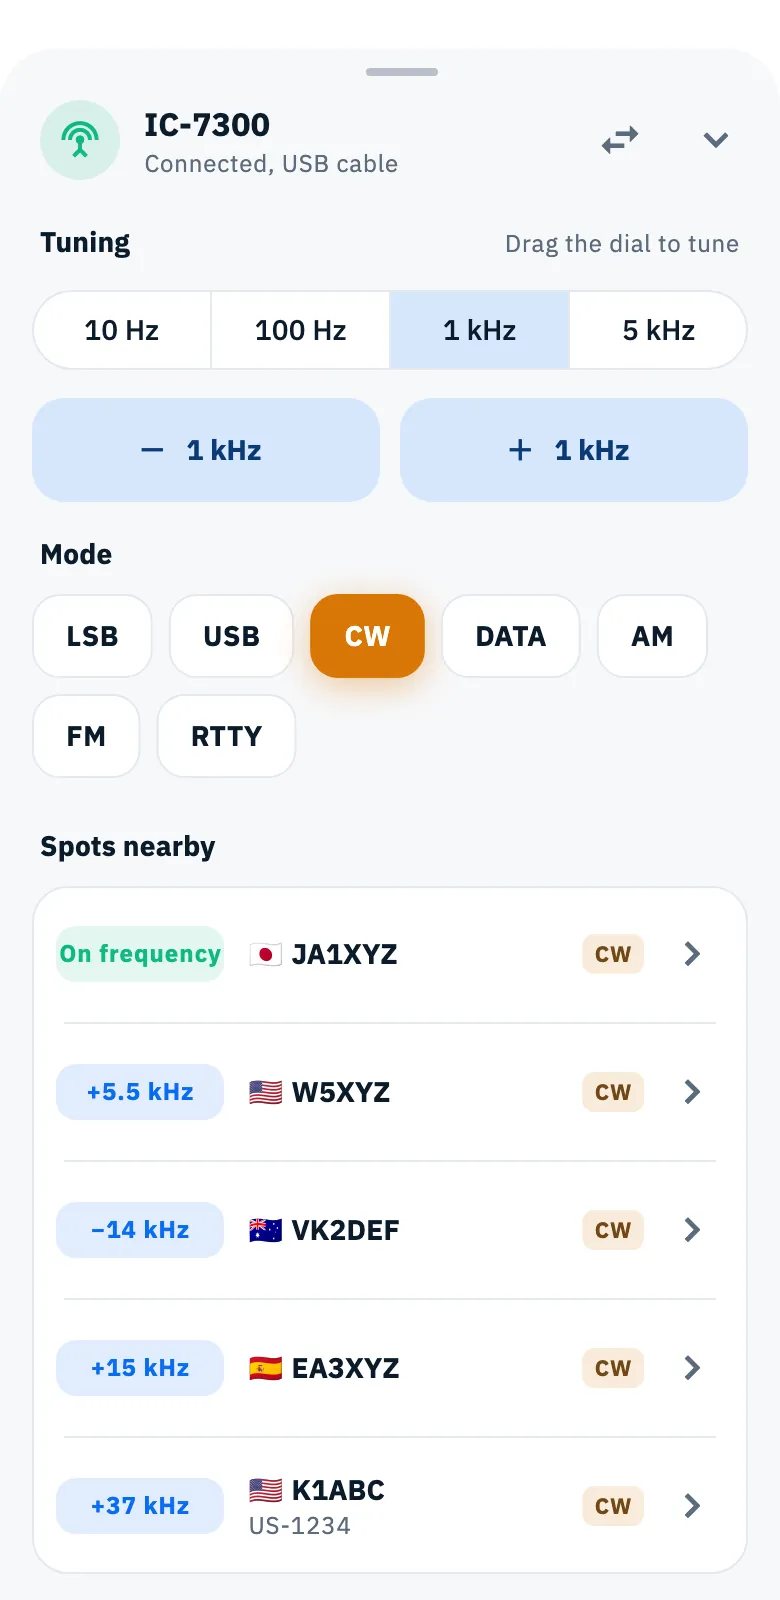
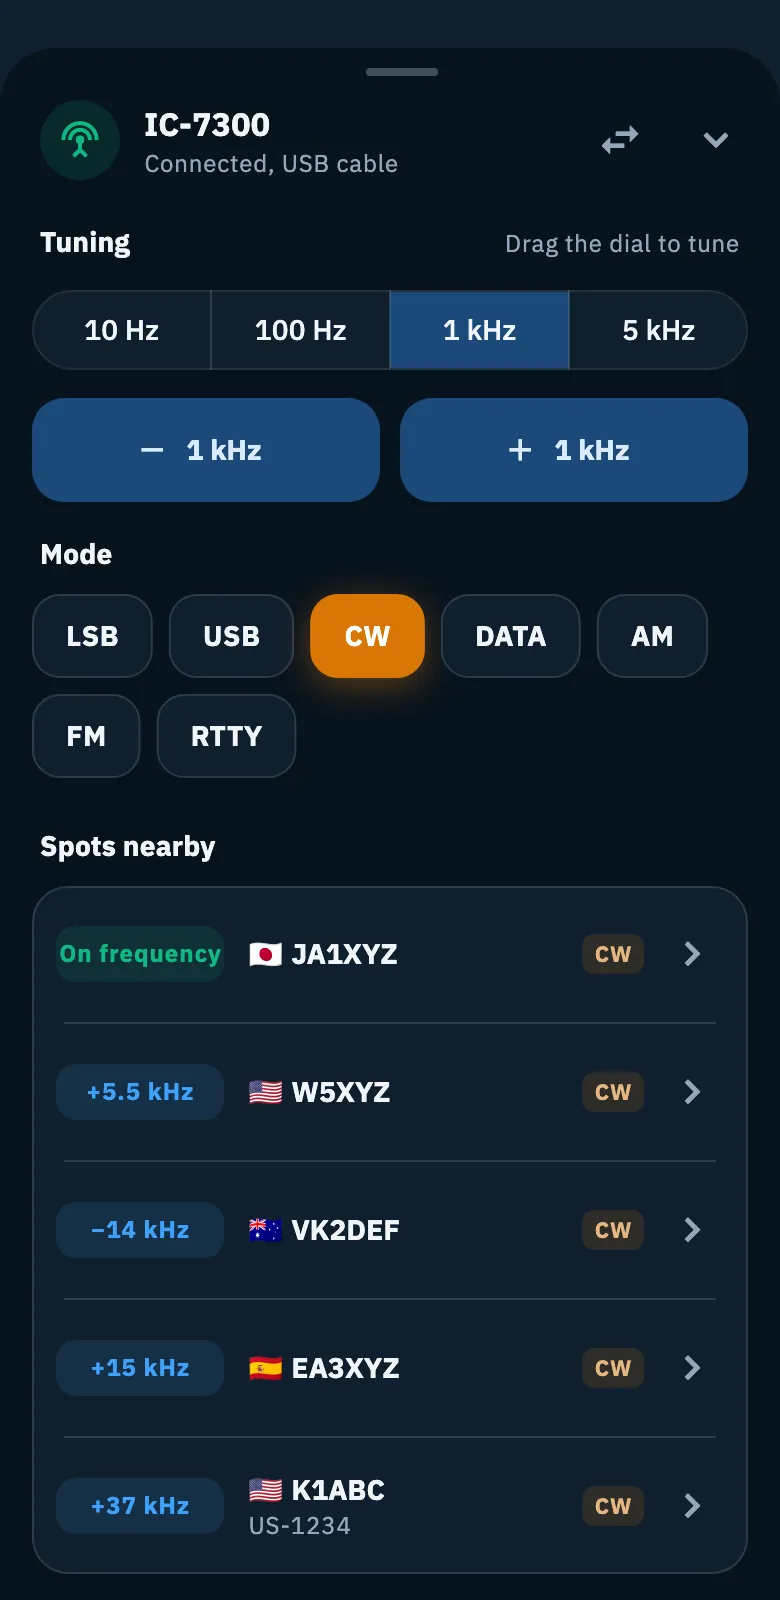
The dial inside the display works like the VFO knob: the frequency is under the fixed needle in the middle, the spots are dots coloured by mode with their callsign above, and the band edges are marked.
- Drag the dial left or right: the radio follows. If you fling it, it keeps going for a while and slows down. On devices that vibrate you feel a click at each tick.
- Tap a dot to put the radio on that spot: the radio takes the spot's frequency and mode, even when Change the mode too is off (that setting is for a tap in the list, see Tuning the radio from spots).
In the Tuning section (with the hint Drag the dial to tune) you choose the tuning step:
- Tap one of the four steps: 10 Hz, 100 Hz, 1 kHz, 5 kHz. The step is also the zoom of the dial: the smaller it is, the more the dial spreads out.
- Tap − or + to move the frequency by one step. The first tap puts the frequency on the step grid: from 14.025.340 with a 1 kHz step, + goes to 14.026.000 and − to 14.025.000.
- Hold − or + down to keep moving until you let go.
| Option | What it does | Default |
|---|---|---|
| Tuning step | How far −, + and the dial move; it is also the step of Alt+← and Alt+→ on a computer (see Keyboard shortcuts). | 1 kHz, every time you open the app |
While you drag, the app sends the radio at most one frequency every 120 ms, always the latest, so the link does not clog. The dial and the buttons change only the frequency, never the mode. Until the radio has reported its frequency, the dial and the Tuning section do not show.
Changing the mode
In the Mode section tap the mode you want: the radio changes mode and stays on the same frequency.
| Mode | Notes |
|---|---|
| LSB, USB | Sideband voice. |
| CW | Lit also when the radio is in CW-R. |
| DATA | USB with the radio's data setting, where it has one: for FT8, FT4 and the other digital modes. |
| AM, FM, RTTY |
The current mode is lit in its colour, the same as in the spots.
Spots nearby
The Spots nearby section shows the 5 spots nearest to the radio frequency, on the same band, taken from the list of spots on screen with its filters. For each one you see the distance in kHz (for example "+5.5 kHz" or "−13.5 kHz"), the callsign, the reference if any and the mode. The spot the radio is on carries On frequency.
- Tap a spot to put the radio on it, with the spot's frequency and mode, as with a dot on the dial.
- Tap the arrow on the right (Open the spot) to close the panel and open the spot (see Opening a spot). Tapping the row of the On frequency spot opens it the same way.
If the list on screen has no spot on the radio's band, the section is not shown.
Logging a QSO
Below the display there is the full-width Log QSO button. When the radio is on a spot, the station's callsign is next to it.
- Tap Log QSO.
- The panel closes and the QSO entry opens with the radio's frequency and mode and, when you are on a spot, the spot's callsign and reference.
See Logging a QSO.
Tools and Disconnect
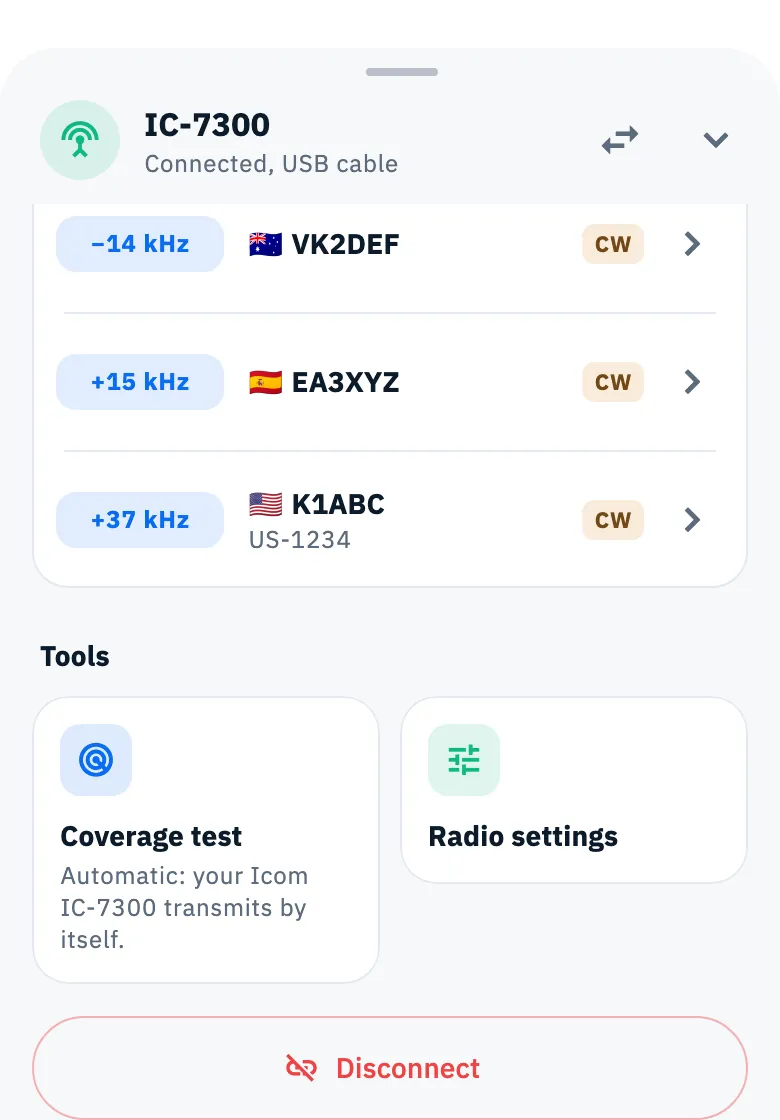
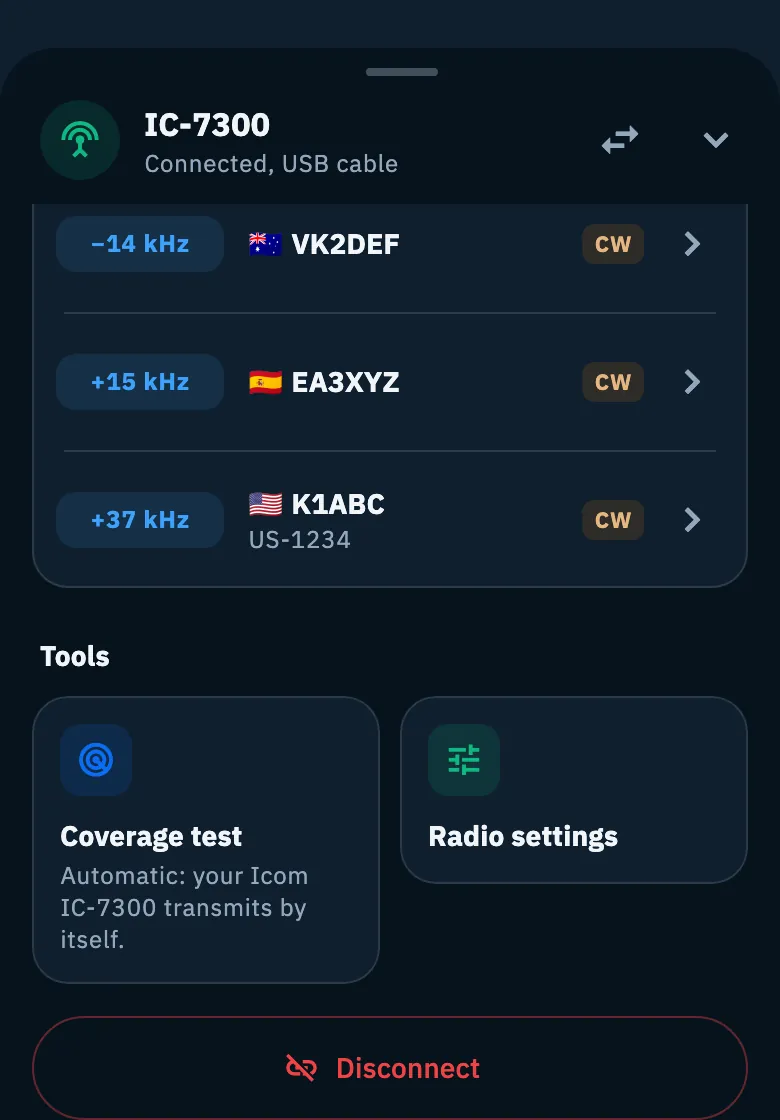
At the bottom of the panel, the Tools section has two shortcuts. Tapping one closes the panel and opens the page.
- Coverage test: opens the coverage test. Under the title the app says what it can do with the radio in use:
- "Automatic: your Icom IC-7300 transmits by itself.", with your radio's model (without a model "Automatic: the radio transmits by itself."), when the radio sends CW over CAT (on the USB cable the app knows it from the model, with rigctld rigctld says so when it connects);
- "Automatic if the radio allows it: we'll know when it connects." with rigctld, when rigctld did not say at connection whether the radio sends CW;
- "With your radio: manual test, you transmit." when the radio does not send CW over CAT, and always with flrig.
- Radio settings: opens My station, with your radios and antennas (see My station: radios and antennas).
The red Disconnect button closes the link with the radio and the panel. After Disconnect the radio does not reconnect by itself when the app starts, until you tap Connect again.
Phone, tablet, web and computer
The panel is the same everywhere. On a phone it takes the width of the screen; on wider screens (tablet, computer) it is at most 640 px wide, centred at the bottom. With a mouse you drag the dial holding the button down. Vibration is there only on devices that have it.
Troubleshooting
- The panel closed by itself. The radio disconnected, or the link dropped: three failed reads in a row, or a command the radio did not answer. Check the cable or the network and connect the radio again (see When the radio does not answer).
- I see no S-meter, power or SWR. The radio or the link does not give them: on the USB cable only CI-V radios, with rigctld it depends on the radio, with flrig never. Power out and SWR show only while transmitting, the S-meter only while receiving.
- The dial and the Tuning section are missing. The radio has not reported its frequency yet: wait a moment or check the link.
- I tap a mode but nothing changes. The radio did not accept the command and stays in the mode it had; the panel shows no message. Check the link and try again.
- The display says "Out of band". The radio is on a frequency outside the amateur bands.
- The Spots nearby section is missing. The list of spots on screen has no spot on the radio's band: check the filters (see Filtering spots by band and mode).
- The tuning step went back to 1 kHz. That is normal: the tuning step starts again from 1 kHz every time the app starts.