
Adding a radio from the catalog
Choose your radio from the catalog of models and let the app fill in type, bands and power, or write the model by hand.
Free and ProUpdated for HamQSO 0.1.19
On this page
Add your radio to My station by choosing the model from the catalog: the app fills in by itself the data a source confirms (brand, type, bands, power) and you change only what you need. The radio's model and usual power then go into your QSOs. Saving radios is free; controlling them over CAT is part of HamQSO Pro.
Opening the «New radio» form
- Open Profile and tap My station.
- In the Radios tab, tap Add radio. If you have no radio yet, tap Add your first radio.
To change a radio you already saved, tap Edit in the ⋮ menu of its row, or on its page (see below): the same form opens, with the radio's name as its title.
On a computer and on the web the radios are in a column: tap Add at the top of the column, or press N.
The same form also opens when you choose the radio of an operation and tap New radio (see Creating an operation), and from Save to the station for a radio written only for an operation: in that case the form arrives already filled in.
On a phone the form opens in a sheet from the bottom; on a tablet and a computer in a window in the middle of the screen.
Choosing the model from the catalog
The catalog gathers radio models from several sources (RigPix, RigReference, Hamlib and CHIRP). It is a copy on your device: searching does not wait for the network.
- At the top of the form, tap Search for the model («We fill in what the catalog confirms»). Radio model opens.
- Type in the «Search, for example 705 or FT-891» field. With no search you first see Most common, then the models grouped by brand.
- If you like, narrow the list with the brand bar: All, the main brands or Other brands.
- Tap your model. The sheet closes and the fields are filled in.
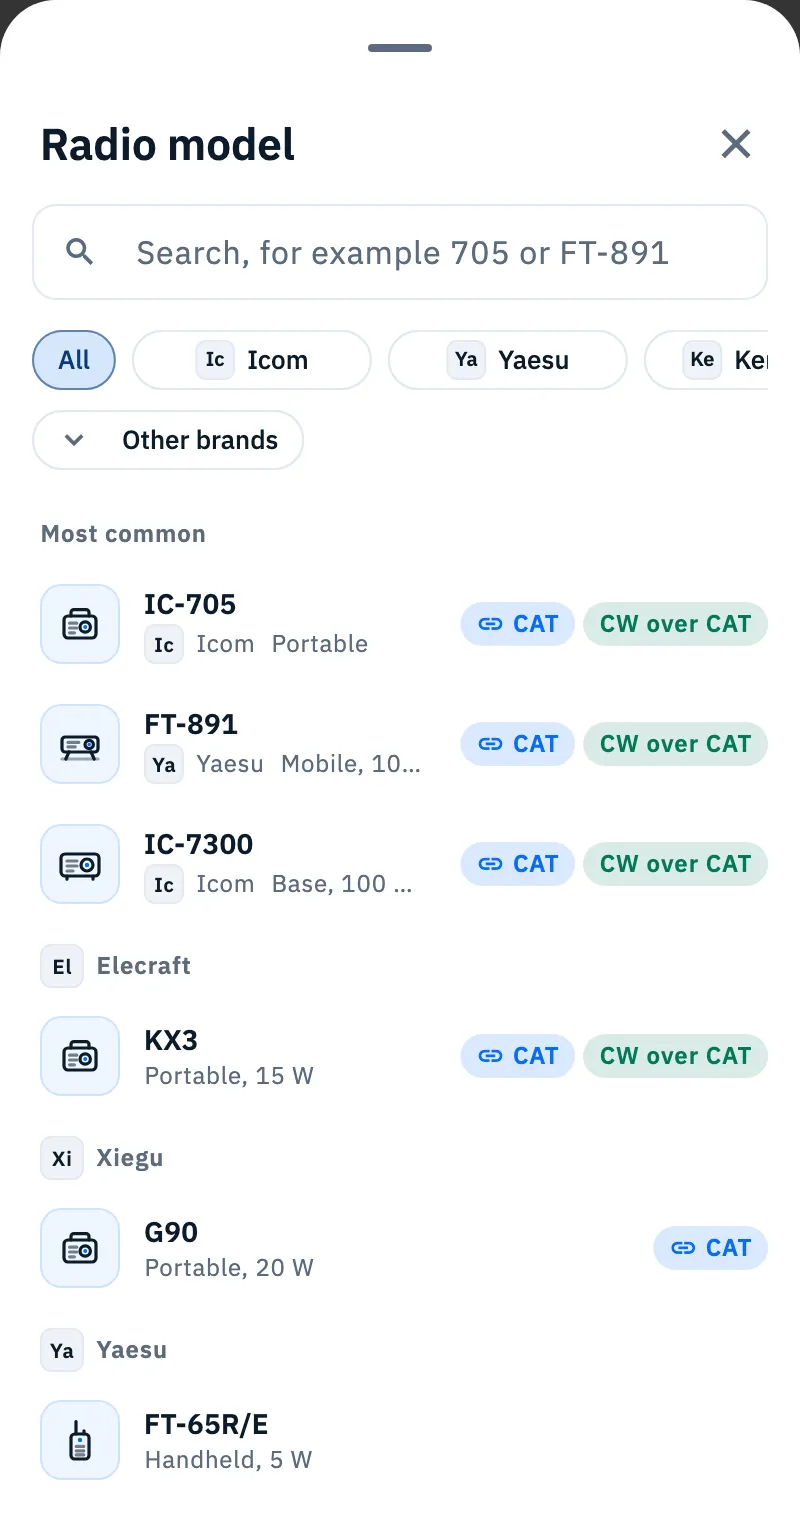
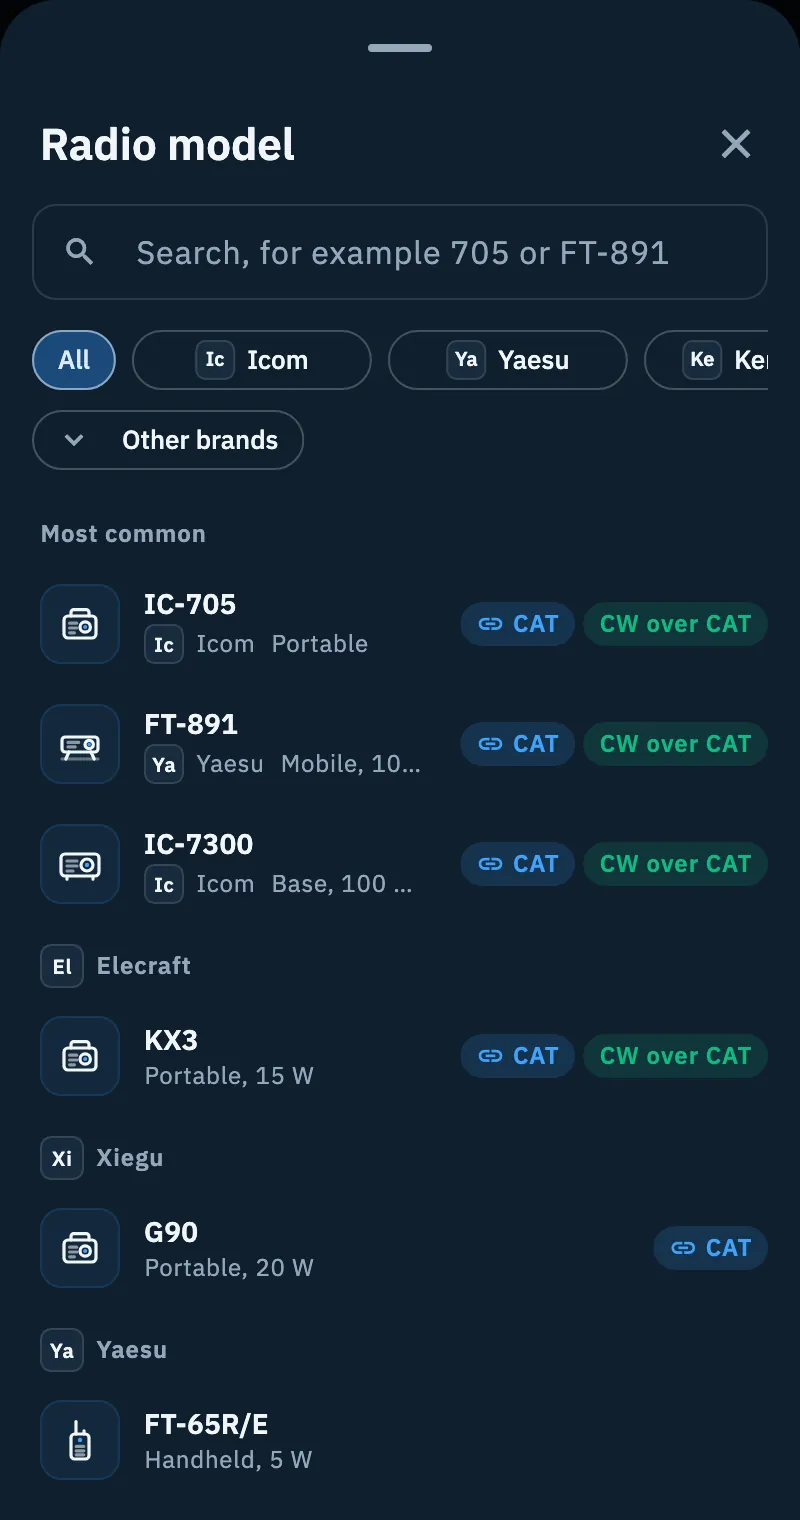
Each row shows the type icon, the model name, its type and maximum power (the most common ones also show the brand). If you searched for another name of the same model, the row says «found as …» (for example «found as FT-65E»). On the right are the badges of what the app can do with that model (see below). More results load as you scroll; on a keyboard, Enter picks the first result.
Other brands opens the Brand sheet, with the «Search for a brand» field, the logo and the number of models of each brand. The brand you choose shows up in the bar and the list shows only its models.
The catalog updates by itself, at most once a day: shortly after the app starts, when the network comes back, when you return to the app and when you open this sheet.
Checking the filled-in fields
After you choose, a box at the top of the form says what happened, for example: «We filled in 4 fields. Source: RigPix, Hamlib. Empty because there is no confirmed value: maximum power, usual power. You can change them all: the ones you touch are marked as changed.»
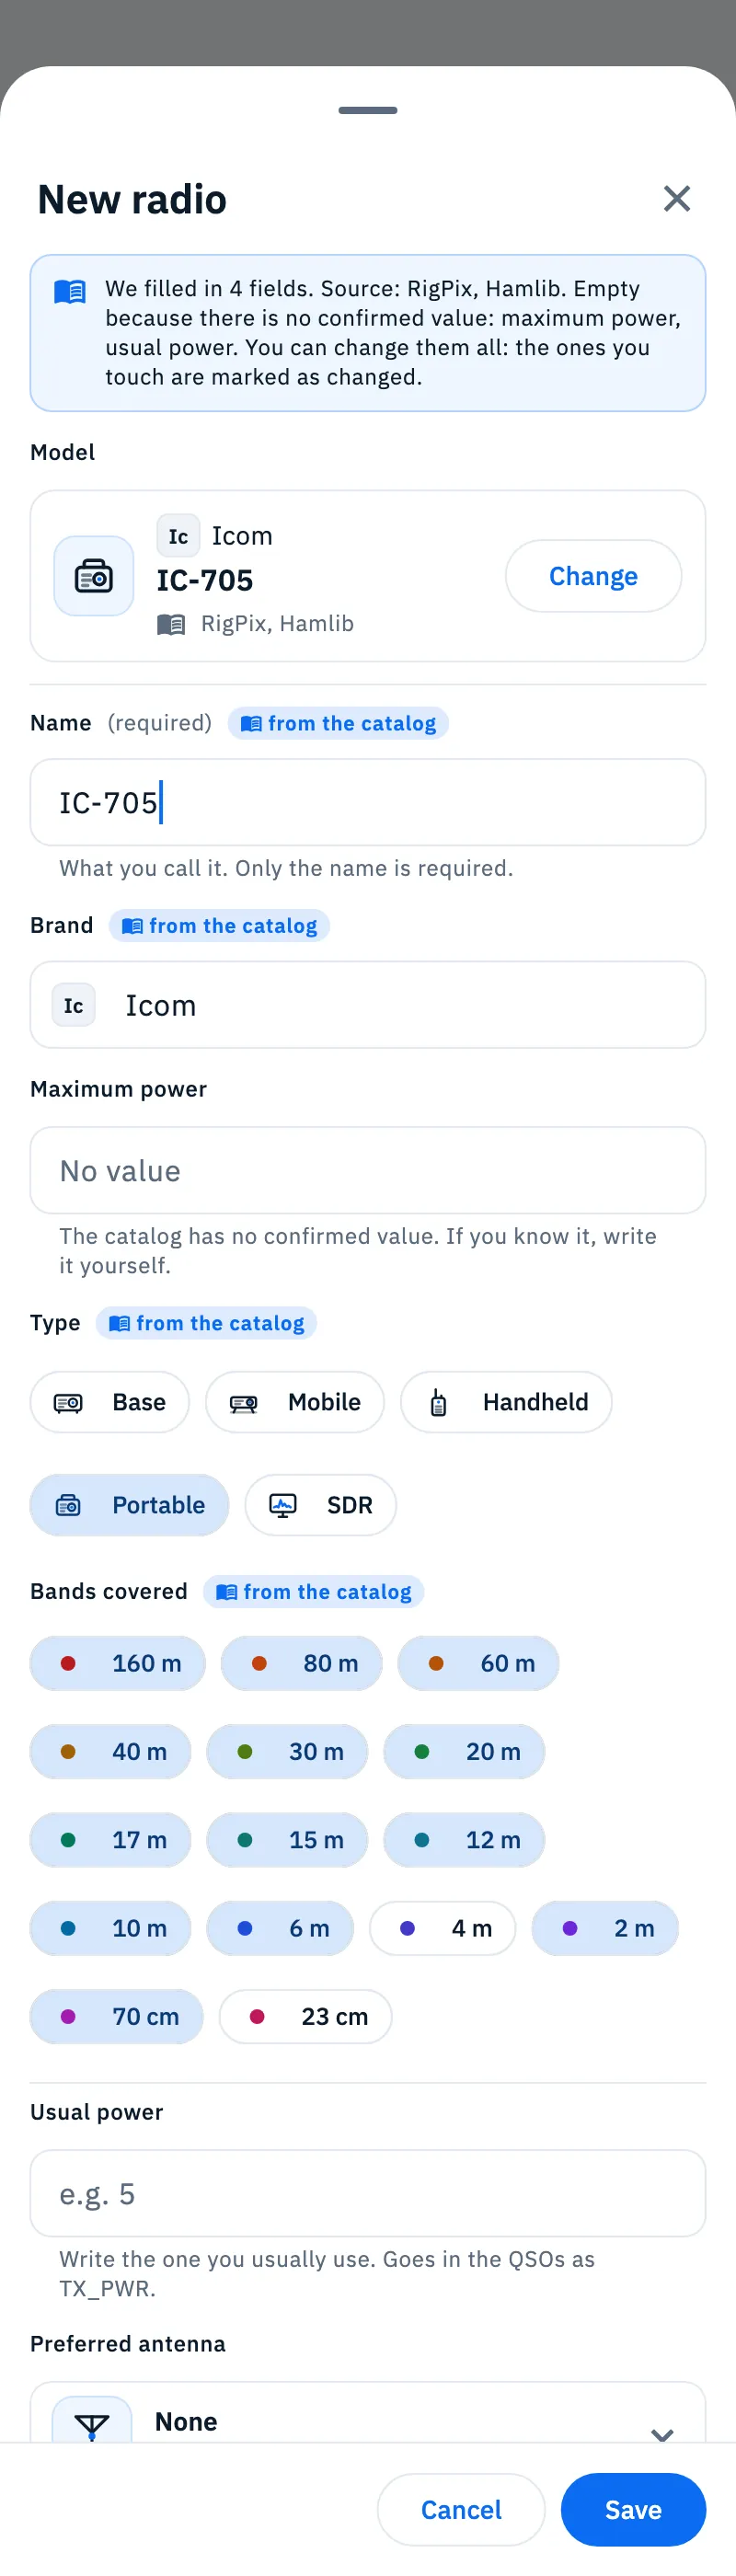
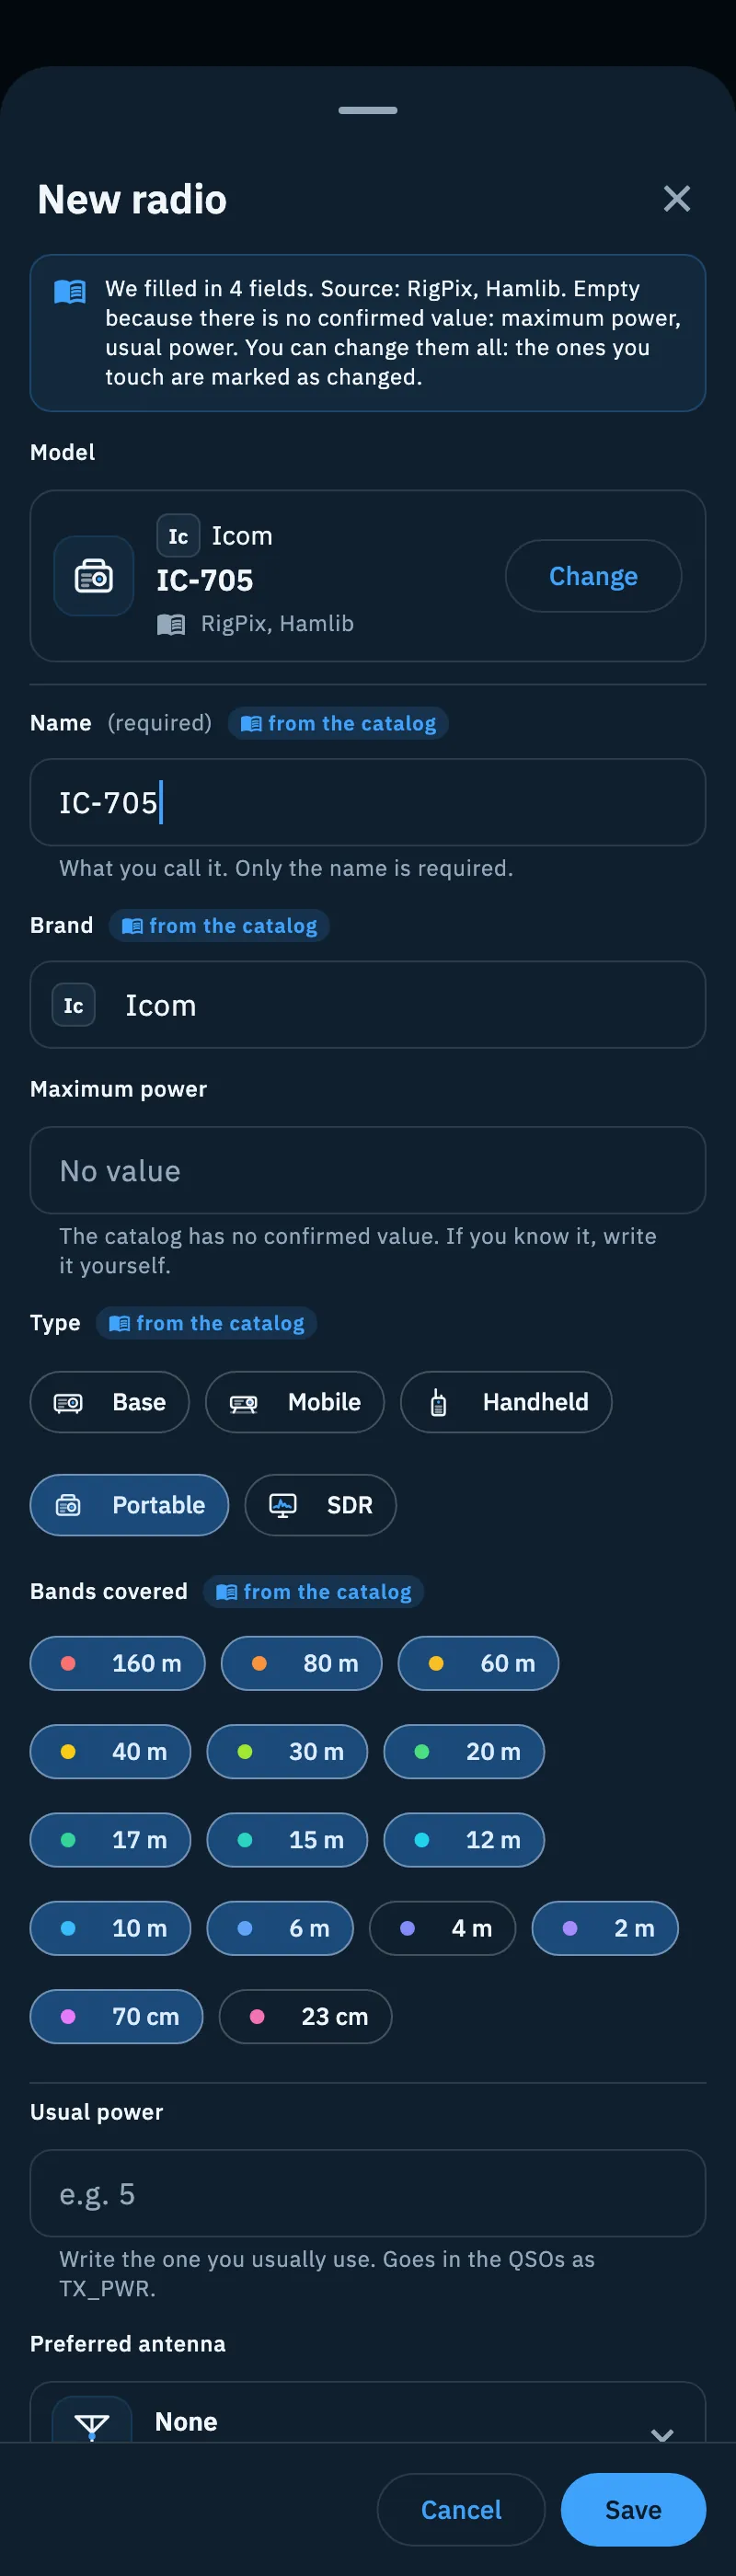
- Each field filled in from the catalog has the from the catalog label. If you change it, it becomes changed, with Restore to put the catalog's value back.
- The catalog fills in only the data that has a source. When the maximum power or the bands are missing, the field stays empty with the note «The catalog has no confirmed value. If you know it, write it yourself.»; under an empty usual power you read «Write the one you usually use. Goes in the QSOs as TX_PWR.»
- The usual power starts from the catalog's maximum power, when there is one: change it to the power you really use.
- For a new radio the name becomes the model's (for example «IC-705»): feel free to change it. A radio that already has a name keeps it even if you change the model.
- The preferred antenna and CAT never come from the catalog.
Under Model there is now the card of the chosen model, with brand, name and the sources of its data. To choose another one, tap Change.
Complete the form and tap Save. «IC-705 added» appears at the bottom; if you are offline, «IC-705 saved here. It reaches your other devices when the network is back.» To leave without saving, tap Cancel or the x at the top. On a computer Esc closes and Ctrl+Enter (⌘+Enter on a Mac) saves, as the line at the bottom of the form reminds you.
The fields of a radio
Only the name is required.
| Field | What it does |
|---|---|
| Model | The model from the catalog, or written by hand. Goes in the QSOs as MY_RIG. |
| Name (required) | What you call it, for example «IC-705 portable». It is the name you see in the lists; with no model, it goes in the QSOs as MY_RIG. |
| Brand | For example «Icom». As you type, the brand's monogram appears. |
| Maximum power | In watts. |
| Type | Base, Mobile, Handheld, Portable or SDR. A second tap on the chosen type removes it. |
| Bands covered | The bands from 160 m to 23 cm. A band saved by another version of the app stays visible and you can remove it. |
| Usual power | In watts, for example 5. Goes in the QSOs as TX_PWR and in the coverage test result. |
| Preferred antenna | Opens the list of your antennas. With «None» the field reminds you «It is set by itself when you choose the radio». See Adding an antenna. |
At the bottom of the form two notes remind you that the CAT link and the tuning preferences are on the radio's page, and that changes apply on all your devices while QSOs already saved stay as they are.
When the model is not in the catalog
For a homebrew radio or a rare model, write the model yourself.
- Tap Not on the list? Write it by hand under Search for the model. You also find it in the catalog: Write it by hand at the end of the list, or Use «…» written by hand when the search finds nothing.
- Type in the Model written by hand field (if you come from the catalog, what you searched for is already there), for example «Homebrew 20 m QRP». It goes in the QSOs as MY_RIG.
- Fill in the name and the other fields yourself, then tap Save.
A model written by hand fills in nothing and has no badges. To go back to the catalog, tap Search the catalog. If you write the model by hand after choosing one from the catalog, the fields keep their values but lose the from the catalog label.
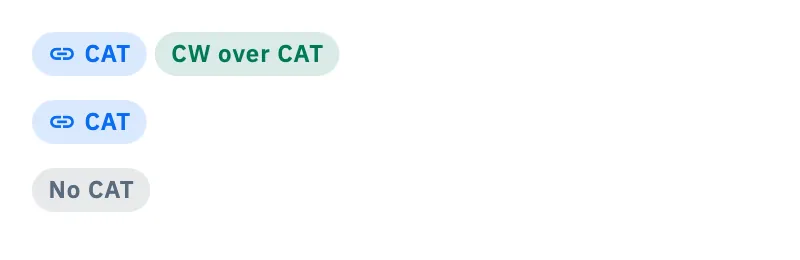
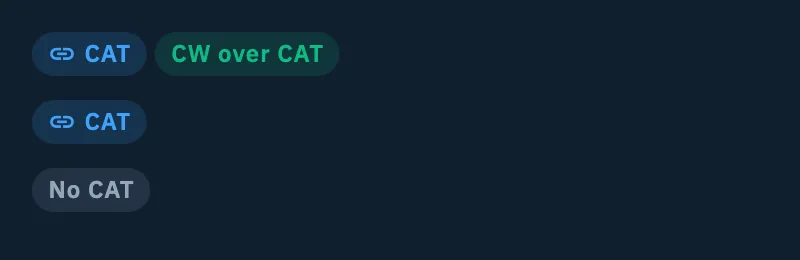
The CAT, CW over CAT and No CAT badges
The badges tell you what the app can do with that model. They do not come from the catalog but from the list of models the app controls.
| Badge | Meaning |
|---|---|
| CAT | The app controls this model directly over the cable: it reads frequency and mode and tunes the radio from spots. |
| CW over CAT | The radio can also transmit the CW of the coverage test by itself. |
| No CAT | The app does not control this model directly over the cable; you can still connect it from a computer with rigctld or flrig. It appears on the radio's page, not in the catalog results. |
A model the app does not control has no badge in the catalog results and has No CAT on the radio's page. A model written by hand has no badge. For the other ways to connect a radio, see Connection types: USB, rigctld and flrig.
The radios the app controls over the cable
The app directly controls 114 models, with settings taken from Hamlib:
- Icom: 60 models, including the IC-705, IC-7300, IC-7610, IC-9700 and IC-905;
- Kenwood: 20 models;
- Yaesu: 16 models, from the FT-817, FT-857 and FT-897 to the FTDX series;
- Elecraft: K2, K3/K3S, K4, KX2/KX3;
- Xiegu: G90, X108G, X5105, X6100, X6200;
- and also the ELAD FDM-DUO, Hilberling PT-8000A, Lab599 TX-500, QRP Labs QCX, QDX and QMX, BG2FX FX4, DL2MAN TruSDX and M0NKA McHF.
About 40 of them transmit CW over CAT; in the list of models of the step-by-step guide they carry a «CW» mark. The Xiegu radios, the Yaesu FT-817/818, FT-857, FT-897 and the Yaesu FTX-1 do not. The other Yaesu radios do it through memory 1 of the keyer, which gets overwritten, and they need break-in on.
The app also knows the frequencies each model receives: a spot outside its coverage (for example 145 MHz with an HF-only radio) is not sent to the radio. To connect it, see Connecting your radio.
The radio's page
Tap a radio in My station: on a phone its page opens, on a tablet and a computer the details open at the side.
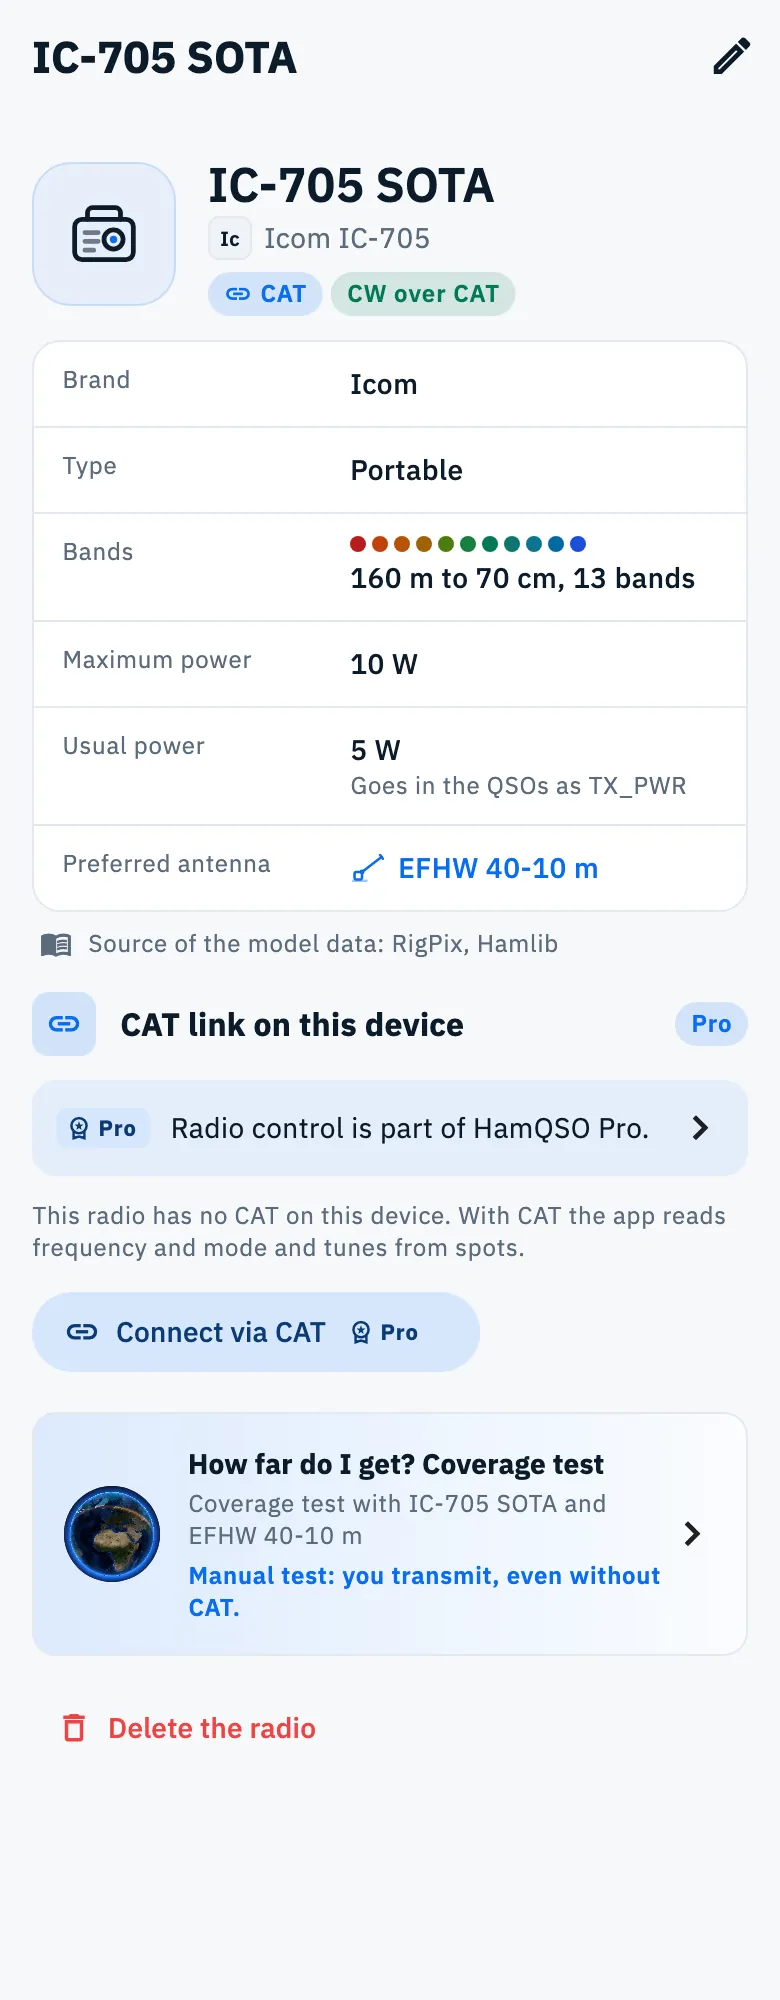
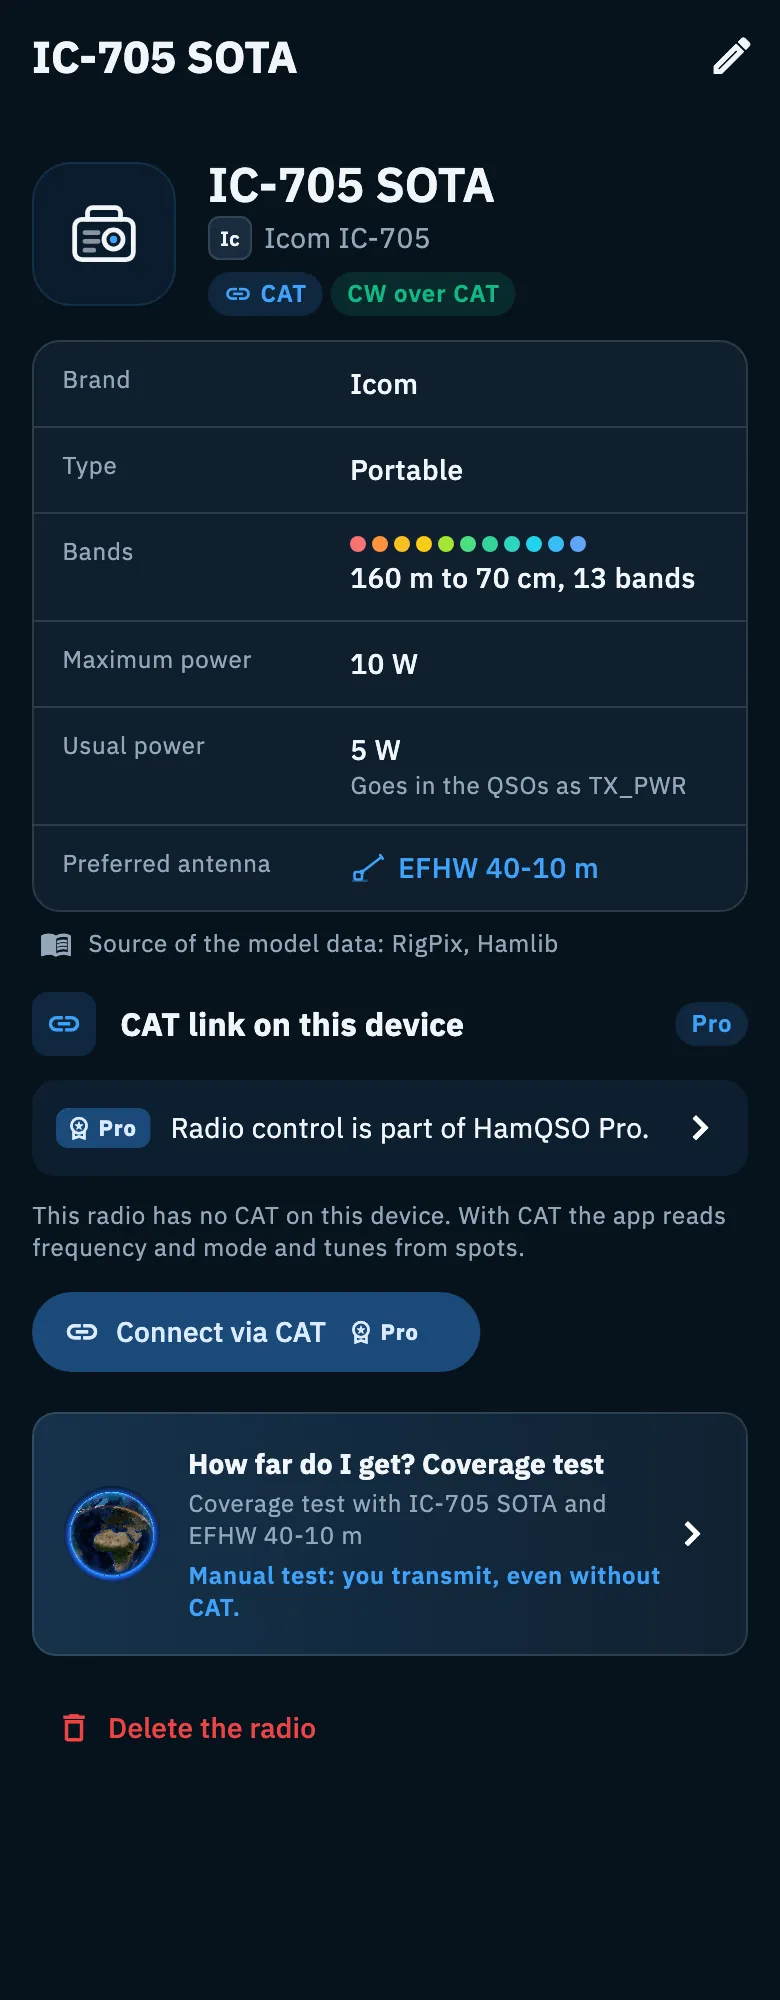
At the top you see the type icon, the name, brand and model, and the model's badges. Below is a table with Brand, Type, Bands, Maximum power, Usual power («Goes in the QSOs as TX_PWR») and Preferred antenna. Missing data says «Not given» or «None». A catalog model also has the line «Source of the model data: …».
- To change the data, tap Edit: on a phone it is the pencil at the top, on a tablet and a computer the button next to the name. The same form opens, with the radio's name as its title.
- Tap the preferred antenna to open it: on a phone its form opens, on a tablet and a computer you move to its details.
- CAT link on this device is the section for controlling the radio from this phone, tablet or computer: see Connecting your radio.
- The How far do I get? Coverage test card («Coverage test with IC-705 SOTA and EFHW 40-10 m») opens the coverage test: see Running a coverage test.
- Delete the radio, in red at the bottom, removes it from all your devices. See My station: radios and antennas.
Troubleshooting
| Message | What to do |
|---|---|
| «It needs a name to recognize it in the list.» | You tapped Save without a name: the cursor goes back to the Name field. Type it and save again. |
| «Write a number in watts, for example 5.» | The power is not a valid number. Write a value above 0 and up to 100,000 W, or leave the field empty. |
| «More than the maximum power (10 W). Check the value.» | The usual power is above the maximum. It is only a warning: the radio is saved anyway, but check the two values. |
| «Loading the catalog of models…» | The catalog is arriving on your device. Wait, or tap Write it by hand next to «Don't want to wait?». |
| «The catalog is not on the device yet» | It needs the network to download the first time. Type the model in the Model field and tap Use: the radio is saved anyway. When the network is back, tap Try downloading it again. |
| «The catalog does not load» | The server did not answer. Tap Retry in a while, or Write it by hand. |
| «No model «…»» | The search does not find the model (or does not find it for the chosen brand). Try another name or All, or tap Use «…» written by hand. |
| «No brand «…»» | The brand is not in the catalog: tap Write it by hand. |
| The box says some fields are empty | The catalog has no confirmed value for those fields. If you know them, write them yourself. |
| The model has no badge | It is a model written by hand. In the catalog results, instead, it is a model the app does not control over the cable. |